Introduction
Read Aloud functionality is the ability of the reader to read text out loud, while synchronizing text highlighting with the reading voice. This is a feature coming from EPUB3 Media Overlays, that PubCoder fully supports on all of the export formats, with the notable exception of KF8, here’s the original description on the Media Overlay Specifications:
Read Aloud support in a file actually means that the file contains an audio track and metadata to sinchronize the text and the audio, that is saved in a SMIL file that links portions (span tags) of the text with a certain timing on the audio track. The actual playback of the read aloud (volume, automatic page turning and so on) depends on the reader app itself and settings can often be changed by the end user.
Here’s an example of a made-with-PubCoder EPUB with read aloud playing on Apple Books on a iPhone XR, with option Turn pages automatically ON:
Read Aloud Wizard
PubCoder allows to easily setup Read Aloud on a page using a Wizard divided in steps that will build everithing out for you without the need to write any code. To setup read aloud on a page, open your project to a page with text objects, then click the Read Aloud button in the project window toolbar, or check Enable Read Aloud in the page inspector at the right of the project window.
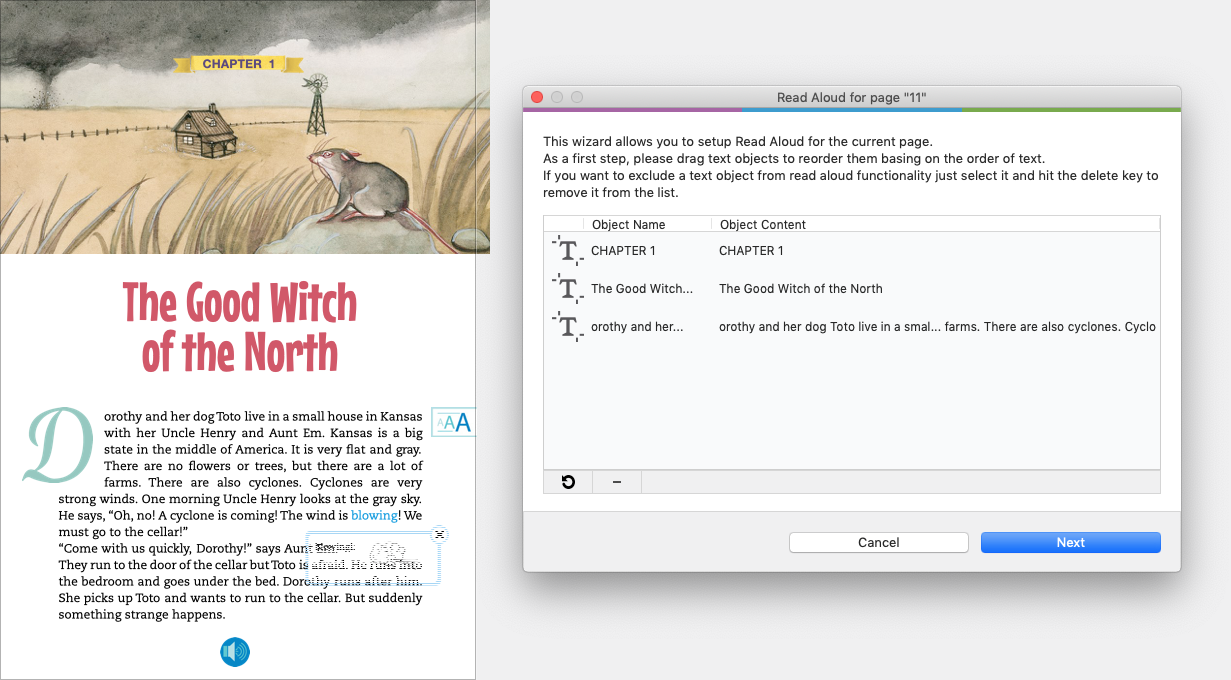
The first step of the wizard (picture above) consists in defining which text objects on the page will take part in the read aloud and eventually reorder them to reproduce the correct sequence for the audio. The wizard should do most of this for you, since it will setup the initial text order to mimic the spatial representation of the text in the page, but you can reorder text boxes manually by dragging them in the list or delete some text boxes clicking on the -, for example captions or text which should not be read aloud.
Note that this step will not be presented if there’s only one text object on the page.
Once the text is defined, click Next to access the next step, where you will be asked to select the audio asset to use as the audio track of your read aloud:
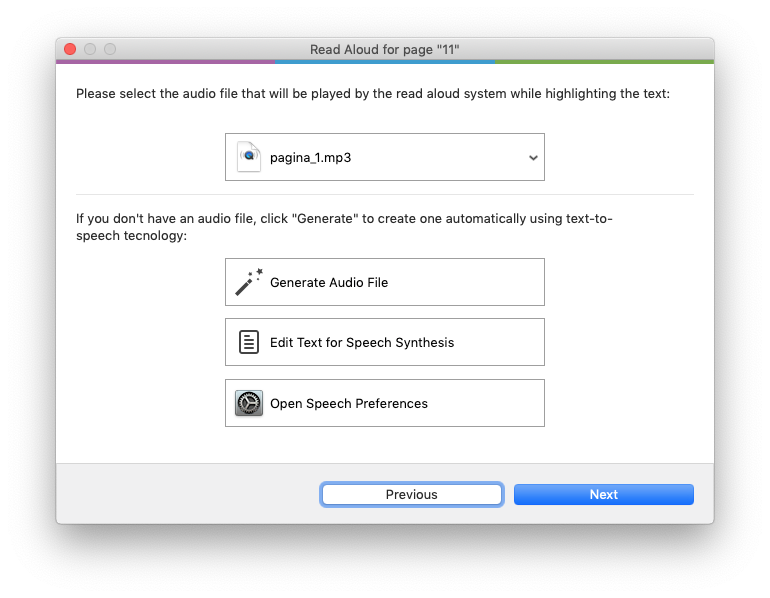
For the best result, you should select a previously recorded audio track, both from your assets library or from a file, in MP3 format.
If you don’t have an audio file, you can generate one with a synthesised voice using macOS or Windows text-to-speech tecnology. In this case, you can use the button Edit Text for Speech Synthesis to change the text that will be used to generate the audio. The default system voice will be used, you can use the Open Speech Preferences to change the voice in your System Preferences panel. When you are ok with your settings, just click Generate to generate the audio and preview it.
Once the audio is defined, click Next to access the next page, where you will define how to split your text into blocks to be highlighted one after another during read aloud playback, e.g. phrase-by-phrase or word-by-word:
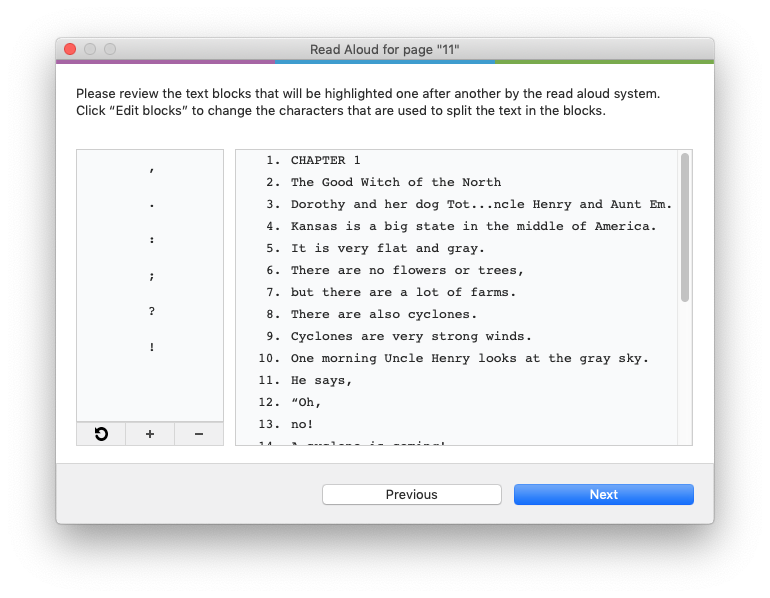
The wizard will automatically split the text phrase-by-phrase. You can click Edit Blocks to edit the list of characters that will be used to split the text, initially containing the various punctuation characters, watching the result on the right, which will update live. For example, adding a space character to the list will allow to setup a word-by-word read aloud, though this is not advised as it implies a heavier cognitive load for the end user.
The last step consists in syncing the text with the audio track:
Just click anywhere to start, and press the space bar (or click the down arrow) to go to the next text block when you hear it playing. You can even go back if you miss a block, just clicking the up arrow. On PubCoder for Mac you can even control the playback speed using the menu in the bottom-left of the window.
When you are done, a confirmation screen will appear, you can preview your result, start to sync again or apply the read aloud to the page.
Manual Read Aloud Setup
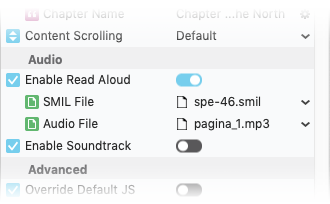
Read Aloud can also be set up manually. Start by turning ON the option Enable Read Aloud in the page inspector, then select or import your SMIL file and audio track. Also remember to add span elements in your text objects code, corresponding to the identifiers in the SMIL file.
Appearance
You can alter the way read aloud blocks will be highlighted using properties in the Read Aloud section of the project inspector; namely Change Text Color and Highlight Text.
If you need more fine-grain or page-specific settings for the highlighting appearance, you can use the Read Aloud Style snippet in the CSS editor: tap the Code button in the project window, then choose Project ▹ CSS or Page ▹ CSS.
Actions and Events
You can switch the read aloud playback directly from your content using the action Start/Stop Read Aloud.
When using XPUB, HTML5, iOS App and Android App formats, you can also react to Read Aloud playback status changes using the events Read Aloud Started and Read Aloud Stopped.